RV slide-outs are great for extra space. But, they need proper adjustments.
Understanding RV slide-out vertical adjustment is crucial for a smooth trip. Traveling in an RV offers comfort and flexibility. But, slide-outs can sometimes cause problems. They can get misaligned, causing leaks or difficulty in operation. This makes it important to know how to adjust them vertically.
A well-adjusted slide-out ensures your RV stays level and functions well. In this guide, we’ll explain the steps to adjust your RV slide-out. You’ll learn how to check for issues and make the necessary adjustments. This knowledge will keep your RV in top shape, making your travels more enjoyable.
Introduction To Rv Slide Outs
RV slide outs are a game-changer for many RV enthusiasts. These movable sections expand the living space inside your RV. With a simple press of a button, your RV can grow in size. This added space makes your RV feel more like home.
Slide outs are found in many RV models today. They offer extra room for dining, sleeping, and relaxing. But, they need proper care to function well. One key aspect is the vertical adjustment of the slide out.
Importance Of Proper Adjustment
The vertical adjustment of an RV slide out is crucial. It ensures the slide out moves smoothly. Proper adjustment helps in avoiding damage to the RV. It also keeps the interior sealed from weather elements.
If a slide out is not adjusted well, it can cause several issues. It may not close properly. This can lead to leaks and drafts. It can also strain the RV’s mechanism, causing wear and tear.
Common Issues With Slide Outs
- Slide out not sealing correctly
- Uneven gaps on one side
- Difficulty in moving the slide out
- Strange noises during operation
These issues often stem from poor vertical adjustment. Regular checks and adjustments can prevent these problems. Keeping your slide out in top condition ensures a comfortable RV experience.
Tools And Materials Needed
Adjusting the vertical alignment of your RV slide-out requires specific tools and materials. Using the right equipment ensures the job is done correctly and safely. This section will cover all the essential tools and safety gear you need.
Essential Tools
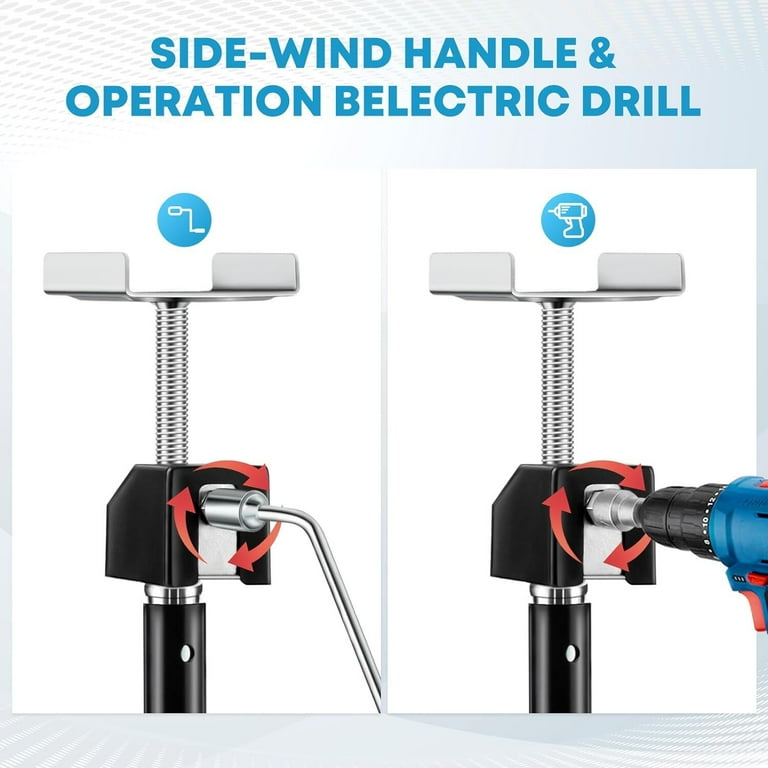
- Screwdrivers – A variety of sizes, both flathead and Phillips.
- Wrenches – Adjustable wrenches are versatile and handy.
- Socket Set – For tightening and loosening bolts.
- Level – Ensures the slide-out is perfectly aligned.
- Measuring Tape – Helps in accurate measurements.
- Jack Stands – Provides support to the RV while adjusting.
- Lubricant – Keeps the slide-out mechanism smooth.
Safety Gear
- Gloves – Protects your hands from sharp edges and debris.
- Safety Glasses – Shields your eyes from dust and particles.
- Work Boots – Ensures foot protection from heavy tools.
- Ear Protection – Reduces noise levels from power tools.
Preparing For Adjustment
Before adjusting your RV slide out, it’s important to prepare properly. Proper preparation can make the task easier and safer. This section guides you through the necessary steps.
Inspecting The Slide Out
First, inspect the slide out for any visible issues. Check for signs of wear and tear. Look for loose bolts or screws. Ensure the slide out moves smoothly without sticking.
- Examine the seals for any cracks or damage.
- Check the slide out rails for rust or debris.
- Look for any obstructions that might hinder movement.
Cleaning The Mechanism
Next, clean the slide out mechanism. A clean mechanism operates more efficiently and reduces the risk of damage.
- Start by removing any dirt or debris from the rails.
- Use a soft brush to clean hard-to-reach areas.
- Wipe down the slide out with a damp cloth.
- Dry the mechanism thoroughly to prevent rust.
Regular cleaning can extend the life of your RV slide out. It also ensures a smoother adjustment process.
Step-by-step Adjustment Guide
Adjusting the vertical position of your RV slide-out is crucial. It ensures smooth operation and prevents damage. This step-by-step guide will help you through the process. Follow each step carefully for the best results.
Loosening The Bolts
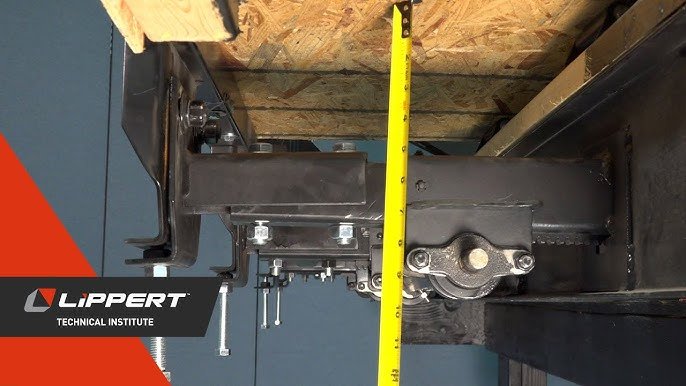
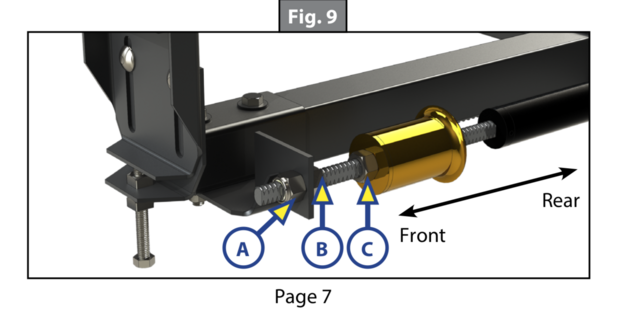
First, locate the bolts holding the slide-out in place. These bolts are usually found at the bottom. Use a wrench to loosen them. Turn the wrench counterclockwise. Do not remove the bolts completely. Just loosen them enough to allow movement.
Adjusting The Vertical Position
Now, gently push or pull the slide-out. Aim to get it in the correct vertical position. You might need a helping hand for this step. Ensure the slide-out is level with the RV floor. Check with a level tool to be sure. Once in the right position, tighten the bolts. Turn the wrench clockwise this time. Make sure the bolts are secure. Your slide-out should now be perfectly aligned.
Testing The Adjustment
Testing the adjustment of your RV slide out is crucial for smooth operation. A proper check ensures that the slide out extends and retracts without any issues. Here is a guide to help you test the adjustment effectively.
Extending And Retracting The Slide Out
Start by extending the slide out fully. Observe its movement and listen for any unusual sounds. The slide should move out evenly without jerking or stopping midway.
- Press the slide out button.
- Watch the slide out extend completely.
- Note any irregular movements or noises.
Next, retract the slide out. Ensure it comes back smoothly to its original position. Any hitches or delays indicate a need for further adjustment.
- Press the retract button.
- Observe the slide out retract fully.
- Check for smooth operation.
Checking For Smooth Operation
After extending and retracting, inspect the slide out for smooth operation. Confirm that it seals tightly against the RV wall. A proper seal prevents water leaks and drafts.
- Extend the slide out fully.
- Check the alignment of the seals.
- Ensure no gaps are visible.
Repeat the process a few times. Consistent performance indicates a well-adjusted slide out. If you notice any issues, readjust the slide out and retest.
| Step | Action | Observation |
|---|---|---|
| 1 | Extend Slide Out | Observe movement, listen for noises |
| 2 | Retract Slide Out | Check for smooth retraction |
| 3 | Inspect Seals | Ensure tight and even sealing |
By following these steps, you ensure your RV slide out works properly. This routine check helps maintain your RV’s functionality and comfort.
Troubleshooting Common Problems
Adjusting your RV slide-out vertically can be tricky. Issues can arise that disrupt your travel plans. This guide will help you troubleshoot common problems. Let’s dive into some frequent issues you might face.
Slide Out Sticking
Slide outs can stick due to dirt or debris. Cleaning the slide-out rails can often solve this problem. Check for any obstructions in the path. Lubricate the rails with a silicone-based spray. Avoid using oil-based sprays. They attract more dirt.
If the slide still sticks, inspect the motor. A weak motor may need replacement. Listen for any unusual sounds. Grinding noises can indicate motor issues. Consult your RV manual for specific motor troubleshooting steps.
Uneven Slide Out Movement
Uneven movement can be frustrating. It often happens due to misalignment. Check the slide-out alignment with a level. Adjust the screws on the top and bottom of the slide. Tighten or loosen them to achieve even movement.
Inspect the hydraulic system if your RV uses one. Low fluid levels can cause uneven movement. Refill the hydraulic fluid as needed. Look for leaks in the hydraulic lines. Fix any leaks to prevent future issues.
Electrical problems can also cause uneven movement. Check the wiring connections. Loose or corroded wires may need replacement. Ensure the battery is fully charged. Weak batteries can impact slide-out performance.
Maintenance Tips
Keeping your RV slide-out in top condition is essential for a smooth travel experience. Regular maintenance ensures your slide-out operates efficiently and prolongs its lifespan. Here are some crucial maintenance tips to follow:
Regular Lubrication
Lubrication is key to the smooth functioning of your RV slide-out. Ensure you use a silicone-based lubricant, which is safe for RVs. Here’s a simple guide:
- Clean the slide-out rails to remove dirt and debris.
- Apply the lubricant on the slide-out rails and gears.
- Move the slide-out in and out to distribute the lubricant evenly.
Perform this task every three months or as needed. This prevents the slide-out from sticking and reduces wear and tear.
Inspecting For Wear And Tear
Regular inspection can catch potential problems before they become costly repairs. Check these areas:
| Component | Signs to Look For |
|---|---|
| Seals | Cracks or gaps in the rubber seals |
| Rails | Rust or corrosion on the metal parts |
| Gears | Worn or damaged teeth on the gears |
Check the seals for cracks or gaps. Ensure the rails are free of rust and corrosion. Inspect the gears for any worn or damaged teeth.
Perform these inspections monthly. This routine helps you address issues early and maintain your RV slide-out’s performance.
Credit: www.jaycoowners.com
When To Seek Professional Help
RV slide outs make your travel experience more comfortable. But they need proper care and maintenance. Sometimes, you may face issues that are beyond your skill set. This is when you need to seek professional help.
Identifying Complex Issues
Some problems are easy to spot. For instance, if the slide out does not move smoothly, it may need lubrication. Simple fixes like this do not require expert help.
But some issues are more complex. If your slide out is not aligning correctly, it may be a structural issue. You might also notice it leaking water during rain. These are signs of deeper problems.
Complex issues often involve the slide out’s mechanical or hydraulic systems. They may also involve the slide out’s alignment or its seal. Fixing such problems needs specialized knowledge.
Finding A Qualified Technician
Finding the right technician is crucial. Look for someone with experience in RV slide outs. A qualified technician will diagnose the issue correctly. They will also have the tools needed to fix it.
To find a good technician, consider these tips:
- Check online reviews to see what others say.
- Ask for recommendations from fellow RV owners.
- Ensure the technician is certified and insured.
Here is a quick comparison to help you find a qualified technician:
| Criteria | What to Look For |
|---|---|
| Experience | At least 5 years with RV slide outs |
| Reviews | Positive feedback from multiple clients |
| Certification | Certified by a recognized body |
| Insurance | Proper liability coverage |
By following these tips, you can ensure your RV slide out gets the expert care it needs. This will help you enjoy a smooth and trouble-free travel experience.
Credit: www.walmart.com
Frequently Asked Questions
How To Adjust Rv Slide Out Vertically?
To adjust an RV slide out vertically, locate the adjustment bolts on the slide mechanism. Use a wrench to turn the bolts clockwise or counterclockwise to raise or lower the slide out.
Why Is My Rv Slide Out Uneven?
An RV slide out can become uneven due to wear and tear, improper maintenance, or misalignment. Regular checks and timely adjustments can fix this issue.
What Tools Are Needed For Slide Out Adjustment?
For adjusting an RV slide out, you typically need a wrench, a level, and sometimes a screwdriver. These tools help in making precise adjustments.
Can I Adjust My Rv Slide Out Myself?
Yes, you can adjust your RV slide out yourself. Follow the manufacturer’s instructions carefully and use the right tools for safety.
Conclusion
Adjusting your RV slide out vertically is crucial for smooth operation. Follow the steps carefully to ensure proper alignment. This helps avoid potential issues and extends your slide out’s life. Regular maintenance checks can prevent unexpected problems. Always refer to your RV’s manual for specific instructions.
Taking the time to adjust correctly saves you hassle down the road. Enjoy your RV adventures with peace of mind. Happy travels!