Replacing an RV awning LED light strip can seem daunting. But it’s easier than you think.
RV adventures are thrilling, but good lighting makes them even better. A functional LED light strip under your awning brightens up your outdoor space. It creates a cozy atmosphere and enhances visibility at night. Sometimes, these light strips wear out or stop working.
Knowing how to replace them ensures you enjoy well-lit evenings on your trips. This guide will walk you through the process, making it simple and stress-free. From selecting the right LED strip to installing it, we’ve got you covered. Let’s dive in and get your RV awning shining brightly again!

Credit: www.youtube.com
Introduction To Rv Awning Led Light Strips
RV awning LED light strips offer a great way to brighten up your camping space. These lights are simple to install and can enhance the ambiance of your outdoor area. Whether you are relaxing under the stars or hosting a gathering, LED light strips provide the perfect lighting solution.
Benefits Of Led Light Strips
LED light strips are energy-efficient. They use less power compared to traditional lighting. This means your RV battery will last longer. LED lights also have a long lifespan. You won’t need to replace them often. They are durable and can withstand various weather conditions.
Another benefit is their flexibility. You can cut them to fit any size awning. They come with adhesive backing, making installation easy. Plus, LED light strips are available in many colors. You can choose the perfect color to match your mood or event.
Types Of Led Light Strips
There are different types of LED light strips for your RV awning. One common type is the single-color LED strip. These are simple and provide a steady light in one color. They are good for those who prefer a consistent lighting option.
Another type is the multi-color LED strip. These allow you to change the light color using a remote control. You can set the mood with various colors. Some even offer color-changing modes. These are perfect for parties or themed events.
Waterproof LED light strips are ideal for outdoor use. They are designed to resist rain and moisture. This makes them perfect for RV awnings, which are exposed to the elements.

Credit: www.youtube.com
Choosing The Right Led Light Strip
Choosing the right LED light strip for your RV awning can make a big difference. The right light strip will provide the perfect ambiance and functionality. Below are key factors to consider:
Length And Brightness
Length is crucial. Measure the length of your awning before buying. Ensure the LED strip fits perfectly. This avoids gaps or overlaps.
Brightness matters too. LED light strips come in different lumens. For outdoor use, a brighter strip is better. It ensures visibility and enhances the overall look.
| Feature | Description |
|---|---|
| Length | Measure your awning accurately to match the LED strip. |
| Brightness | Choose higher lumens for better outdoor visibility. |
Weather Resistance
Weather resistance is a must. Your LED strip will face rain, sun, and wind. Look for waterproof or weatherproof ratings. IP65 or higher is ideal for outdoor use.
- IP65: Protects against low-pressure water jets.
- IP66: Protects against powerful water jets.
- IP67: Can withstand immersion in water up to 1 meter.
Ensure the LED strip can handle your local weather conditions.
Tools And Materials Needed
Replacing your RV awning LED light strip is a straightforward task. Having the right tools and materials ensures a smooth process. This guide covers the essential tools and materials needed for the job.
Essential Tools
Before starting the replacement, gather the following tools:
- Screwdriver set – For removing and securing screws.
- Wire cutters – To cut and strip the wires.
- Heat gun – For heat-shrink tubing.
- Measuring tape – To measure the length of the LED strip.
- Drill – For making necessary holes.
- Multimeter – To check electrical connections.
- Utility knife – For trimming the LED strip.
- Adhesive remover – To remove old adhesive residue.
Required Materials
Ensure you have these materials ready:
- New LED light strip – Choose a waterproof and flexible strip.
- Heat-shrink tubing – For protecting wire connections.
- Electrical tape – To secure wire connections.
- Silicone sealant – To waterproof the connections.
- Connectors – For joining wires securely.
- Mounting clips – To hold the LED strip in place.
- Cleaning solution – To clean the installation area.
- Zip ties – For organizing wires neatly.
Having these tools and materials ensures a successful and hassle-free replacement of your RV awning LED light strip. Proper preparation makes the task easier and more efficient.
Preparing Your Rv Awning
Replacing your RV awning LED light strip can enhance your camping experience. Before you start, prepare your awning properly. This ensures the new lights adhere well and last longer. Follow these steps for a smooth replacement process.
Cleaning The Surface
Begin by cleaning the awning surface. Dust and dirt can prevent the LED strip from sticking properly. Use a soft cloth and mild detergent. Avoid harsh chemicals that can damage the awning.
Rinse the area thoroughly with water. Dry it completely with a clean towel. A dry surface ensures better adhesion for the LED strip.
Measuring The Area
Next, measure the area where you will place the LED light strip. Accurate measurements help you buy the right length of the strip. Use a measuring tape for this step.
Start from one end of the awning and measure to the other end. Note down the measurement. Check the LED strip packaging to ensure it matches your measured length.
These steps help you prepare your RV awning effectively. Clean and measure the area for a successful LED light strip replacement.
Removing The Old Light Strip
Replacing your RV awning LED light strip can brighten your travel experience. The first step is removing the old light strip. This process involves disconnecting the power and detaching the strip. Below, we break down each step to make the task simple and straightforward.
Disconnecting Power
Before handling any electrical component, always disconnect the power. This ensures your safety and prevents damage to the RV’s electrical system.
- Locate the power source for the LED light strip.
- Turn off the switch or unplug the connector.
- Verify the power is off using a voltage tester.
These steps are crucial. They ensure no electricity flows through the wires while you work on the light strip.
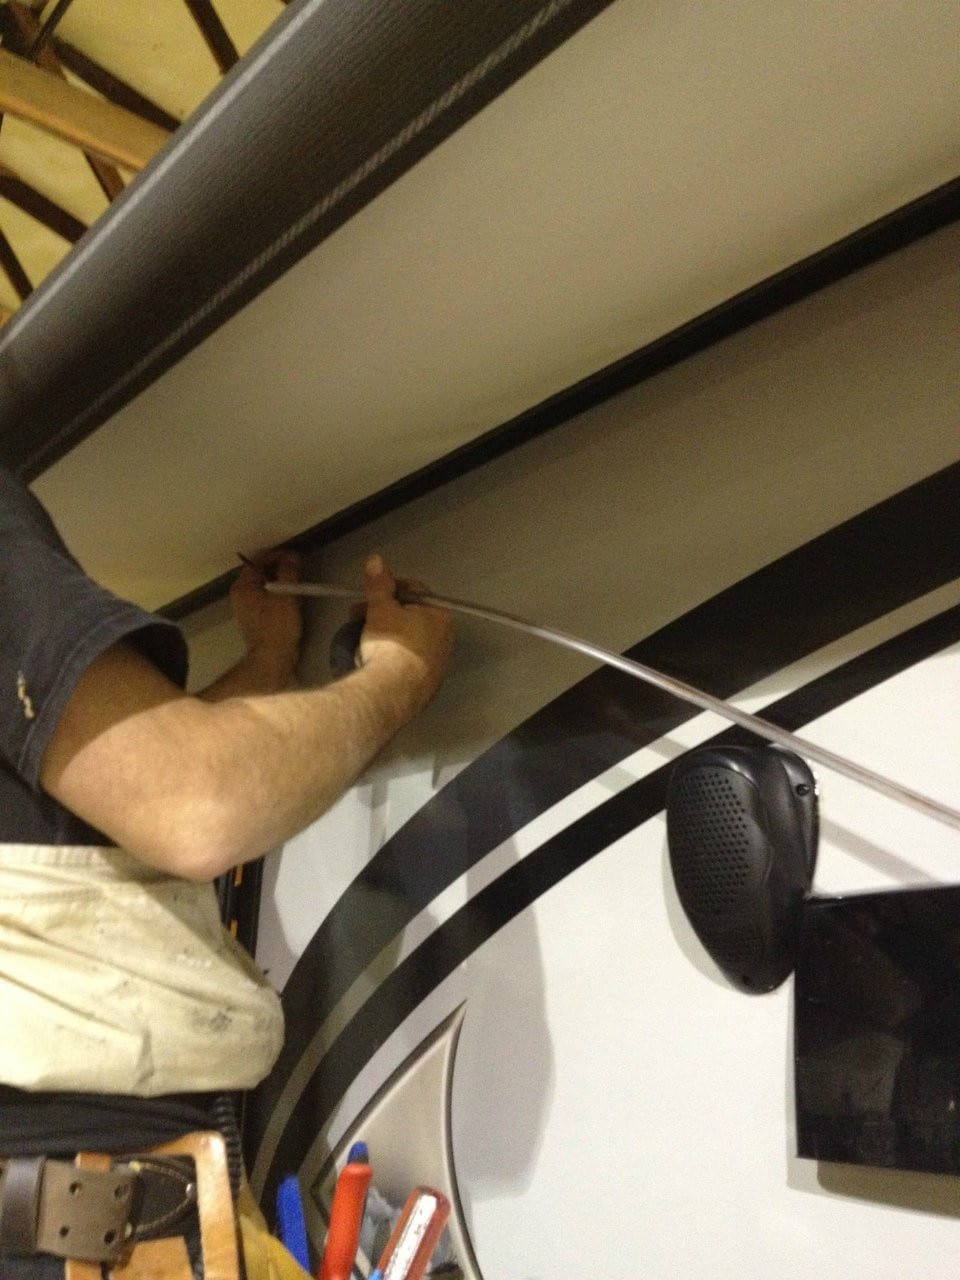
Detaching The Strip
Once the power is off, it’s time to detach the old light strip. Follow these simple steps:
- Find the starting point of the light strip.
- Gently peel back the strip from the awning. Use a plastic pry tool if needed.
- If the adhesive is strong, apply a bit of heat using a hairdryer.
- Continue peeling until the entire strip is removed.
Note: Be careful not to damage the awning material. Take your time and work slowly.
After removing the strip, clean the area with rubbing alcohol. This ensures the new light strip adheres properly.
Credit: www.trekwood.com
Installing The New Led Light Strip
Replacing your RV’s awning LED light strip can enhance your outdoor experience. The new lights will be brighter, more energy-efficient, and longer-lasting. Follow these steps to install your new LED light strip easily.
Attaching The Strip
Start by cleaning the surface where you will attach the strip. Use a damp cloth to remove dirt and debris. Ensure the surface is dry before proceeding.
Next, measure the length of the area and cut the strip to fit. Most LED strips have cut marks where you can safely trim them. Be precise to avoid wasting any part of the strip.
Peel off the adhesive backing from the LED strip. Carefully press the strip onto the cleaned surface. Press firmly to ensure it sticks well. Avoid stretching the strip as this may damage the LEDs.
For better adhesion, you may use additional clips or brackets. These can be placed at regular intervals to support the strip.
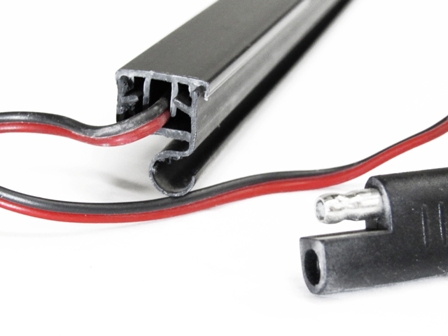
Connecting The Power
Locate the power source for your new LED light strip. This can be the existing wiring from your old lights. Ensure the power is turned off before you start working.
Match the positive and negative wires from the strip to the corresponding wires from your RV. Typically, red is positive and black is negative. Use wire connectors or soldering to join the wires securely.
Once connected, cover the exposed wires with electrical tape. This prevents short circuits and protects the connection from moisture. Turn on the power and test the lights. If they do not light up, check your connections.
For a professional finish, tuck the wires neatly and secure them with cable ties. This keeps your installation clean and safe.
Testing And Troubleshooting
Replacing an RV awning LED light strip can be straightforward. Yet, testing and troubleshooting are critical steps to ensure everything works correctly. Proper checks can save time and prevent potential issues down the road. Here are the steps to verify the installation is a success and address any common issues that might arise.
Ensuring Proper Functionality
After installing the new LED light strip, the first step is to ensure proper functionality. Here’s how:
- Power Check: Confirm the RV’s power supply is on and sufficient.
- Connection Check: Inspect all connections. They should be secure and correct.
- Remote Control: Test the remote control (if applicable). Ensure it is synced with the light strip.
- Light Check: Turn on the lights. Verify all sections light up evenly.
If any issues arise during these checks, addressing them promptly is essential.
Addressing Common Issues
Even with careful installation, some common issues can occur. Here are steps to troubleshoot them:
| Issue | Solution |
|---|---|
| Lights Not Turning On |
|
| Lights Flickering |
|
| Uneven Lighting |
|
By following these testing and troubleshooting steps, you can ensure your RV awning LED light strip functions perfectly, enhancing your RV experience.
Maintenance Tips For Longevity
Replacing the LED light strip on your RV awning can enhance your camping experience. To ensure your new light strip lasts, proper maintenance is crucial. Here are some essential maintenance tips for longevity.
Regular Cleaning
Keep your LED light strip clean for optimal performance. Dust and dirt can accumulate over time. Use a soft cloth to wipe down the strip. Avoid harsh chemicals; they can damage the lights. Mild soap and water work best. Ensure the strip is dry before use.
Periodic Inspections
Check your LED light strip regularly. Look for any signs of wear or damage. Loose connections can affect performance. Tighten any loose screws or bolts. Replace damaged sections immediately. Regular inspections can prevent bigger issues.
Enhancing Your Rv Experience
Replacing your RV awning LED light strip can greatly improve your travels. It creates a welcoming and comfortable atmosphere. The right lighting can transform your RV space. It makes evenings more enjoyable and practical.
Creative Lighting Ideas
Consider warm white lights for a cozy feel. Place the LED strip under cabinets for soft, indirect lighting. Use color-changing LEDs for fun and festive nights. Add lights around the awning for better outdoor visibility.
Safety Considerations
Ensure the LED light strip is waterproof. This protects against rain and moisture. Check the voltage compatibility with your RV system. Proper installation prevents electrical issues. Choose durable and high-quality lights for long-term use.
Frequently Asked Questions
How Do You Replace An Rv Awning Led Light Strip?
To replace an RV awning LED light strip, first remove the old strip carefully. Clean the surface and apply the new strip with adhesive backing. Connect the wiring as per instructions.
What Tools Do I Need For Led Strip Replacement?
You will need basic tools like a screwdriver, wire cutters, and adhesive cleaner. These help in removing old strips and attaching new ones securely.
Can I Install Led Light Strips Myself?
Yes, you can install LED light strips yourself. Follow the manufacturer’s instructions for a hassle-free installation. Basic DIY skills are sufficient.
How Long Do Rv Awning Led Lights Last?
RV awning LED lights typically last between 30,000 to 50,000 hours. This depends on usage and quality. Proper maintenance can extend their lifespan.
Conclusion
Replacing your RV awning LED light strip is a smart move. It enhances your RV experience. Bright, efficient lighting makes evenings more enjoyable. Plus, it’s easy to install. No need for technical skills. Just follow simple steps. Your RV will feel more welcoming.
And, you’ll save on energy costs. So, give your RV a fresh look. Enjoy better lighting on your next adventure. Happy travels and safe journeys!