Are you tired of your RV’s outdated faucet? Replacing it with a residential one might be the solution.
This simple upgrade can transform your RV kitchen or bathroom. Many RV owners face the challenge of limited options and outdated designs in their RVs. Upgrading to a residential faucet can bring a touch of home comfort to your travel experience.
Modern residential faucets offer better functionality and stylish designs. The process is straightforward and can be done with basic tools. In this guide, we will walk you through the steps to replace your RV faucet with a residential one. Get ready to enjoy a more efficient and aesthetically pleasing space in your RV.
Benefits Of Upgrading Your Rv Faucet
Upgrading your RV faucet to a residential model can bring many benefits. These benefits range from improved water flow to enhanced aesthetics. A new faucet can make your RV feel more like home.
Improved Water Flow
A residential faucet often provides better water pressure. This makes washing dishes and hands easier. You will notice a steady stream of water. Unlike RV faucets, residential ones are built to last. This means fewer leaks and better performance over time. You will enjoy a more reliable water source in your RV.
Enhanced Aesthetics
Residential faucets come in many styles and finishes. This allows you to match your RV’s decor. A sleek, modern faucet can update the look of your kitchen or bathroom. It adds a touch of elegance and sophistication. Guests will notice the upgrade right away. Your RV will look more stylish and inviting.
Choosing The Right Residential Faucet
Upgrading your RV faucet to a residential one can make a big difference. The right faucet not only improves functionality but also enhances the look of your RV kitchen or bathroom. But how do you choose the right residential faucet? Here are some tips to guide you through the process.
Types Of Faucets
There are several types of faucets to consider:
- Single-handle faucets: These are easy to install and use.
- Double-handle faucets: These provide precise temperature control.
- Pull-down faucets: These offer flexibility and ease of use.
- Wall-mounted faucets: These save counter space and look stylish.
Key Features To Consider
When choosing a residential faucet, consider these key features:
| Feature | Description |
|---|---|
| Material | Choose a durable material like stainless steel or brass. |
| Finish | Pick a finish that matches your RV’s decor. Options include chrome, brushed nickel, and bronze. |
| Spout Height | Ensure the spout height suits your sink and usage needs. |
| Installation | Check if the faucet is easy to install with the available space and plumbing. |
By keeping these features in mind, you can choose the right faucet for your RV. This will ensure it meets your needs and enhances your RV’s functionality and style.
Tools And Materials Needed
Replacing an RV faucet with a residential one can be a rewarding DIY project. To make this task easier, having the right tools and materials is essential. This guide outlines everything you need to get started.
Essential Tools
- Adjustable Wrench: Useful for loosening and tightening various nuts and bolts.
- Pipe Wrench: Perfect for gripping and turning pipes securely.
- Screwdrivers: Both flathead and Phillips types are often needed.
- Pliers: Handy for gripping and manipulating small parts.
- Plumber’s Tape: Ensures a tight, leak-free seal on threaded connections.
- Bucket: Catches any water that might spill during the process.
- Towels or Rags: Keep your workspace clean and dry.
Required Materials
- Residential Faucet: Choose a faucet that fits your design and functionality needs.
- Supply Lines: Ensure these are compatible with both your faucet and RV plumbing.
- Adapters: You might need these to connect different-sized pipes.
- Sealant: A silicone-based sealant can prevent leaks around the faucet base.
- Mounting Hardware: Often included with the faucet, but double-check to be sure.
Having these tools and materials on hand will make replacing your RV faucet with a residential one a smooth process. Proper preparation is key to a successful installation.

Credit: happiestcamper.com
Preparing Your Rv For Installation
Are you ready to upgrade your RV faucet to a residential model? It’s easier than you think. Preparing your RV for installation is the first step. Follow these simple steps to ensure a smooth and successful process.
Shutting Off Water Supply
Before you begin, shut off the water supply to your RV. Look for the main water valve, usually located near the water tank. Turn the valve clockwise to close it. This prevents any water from flowing while you work on the faucet.
Removing The Old Faucet
Next, you’ll need to remove the old faucet. Start by opening the faucet to release any remaining water. Use a wrench to loosen the nuts connecting the faucet to the plumbing. Once the nuts are loose, carefully lift the old faucet out of its place. Be sure to keep all parts in a safe spot, as you might need them later.
If your faucet is stuck, apply some penetrating oil to the nuts. Wait a few minutes, then try again. If it’s still stuck, use a pair of pliers for extra grip. Once the faucet is removed, clean the area thoroughly. Remove any old putty or debris to ensure a good fit for the new faucet.
Installing The New Residential Faucet
Replacing your RV faucet with a new residential model can upgrade your kitchen’s look. It will also improve functionality. Below, we’ll walk you through the process of installing your new faucet.
Positioning The Faucet
Start by positioning the new faucet in the existing holes on your sink. Ensure it is centered and aligned properly. Use a wrench to secure the mounting nuts from underneath. This will keep the faucet in place.
If your faucet comes with a deck plate, align it with the holes first. Then, position the faucet on top of it. This creates a stable base for your faucet.
Connecting The Water Lines
Next, connect the water lines to the new faucet. Use flexible hoses to connect the hot and cold water supply lines. Match the colored indicators on the faucet to the respective water lines.
Use a wrench to tighten the connections. Make sure not to overtighten, as this can cause damage. Once connected, turn on the water supply and check for leaks.
If you notice any leaks, tighten the connections slightly more until they stop. Test both hot and cold water to ensure proper installation.

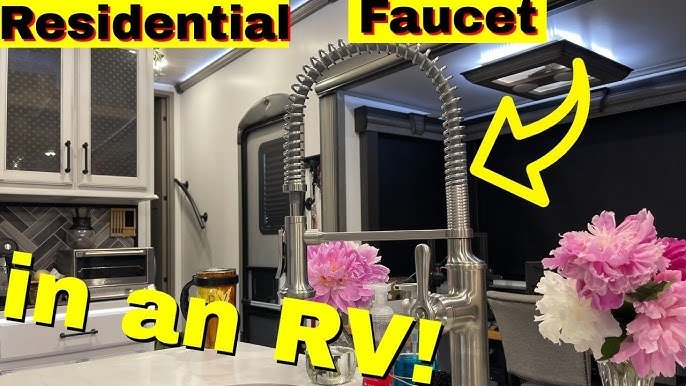
Credit: www.youtube.com
Testing And Adjusting The Faucet
After installing your new residential faucet in your RV, it is crucial to test and adjust it. This ensures proper functionality and avoids potential problems down the road. The following steps will guide you through checking for leaks and adjusting the water pressure.
Checking For Leaks
Turn on the water supply to your RV. Examine the faucet and the connections closely. Look for any signs of leaks. Pay attention to the area where the faucet connects to the water lines. If you notice any drips or moisture, tighten the connections. Use a wrench if necessary. Check again to ensure there are no leaks.
Adjusting Water Pressure
Next, test the water pressure. Turn on the faucet and let the water flow. Observe the strength of the water stream. If the pressure seems too high or too low, you may need to adjust it. Locate the pressure regulator, usually found near the water pump. Adjust the setting as needed. Turn the faucet on again to check if the pressure is now suitable. Repeat this process until you achieve the desired water pressure.
Maintaining Your New Faucet
Maintaining your new RV faucet can prolong its lifespan and keep it looking good. Regular maintenance is simple and ensures efficient operation. Below, you will find tips on cleaning and preventing mineral buildup.
Regular Cleaning Tips
Wipe the faucet with a soft cloth daily. This removes dirt and stains. Use mild soap and warm water for a deeper clean. Avoid abrasive cleaners that might scratch the surface. Rinse with clean water and dry with a soft towel. This prevents water spots and keeps it shiny.
Preventing Mineral Buildup
Mineral buildup can cause problems over time. To prevent this, soak a cloth in vinegar. Wrap the cloth around the faucet and leave for an hour. Rinse with warm water afterward. This dissolves and removes mineral deposits. Repeat monthly for the best results.

Credit: www.amazon.com
Common Installation Challenges
Replacing an RV faucet with a residential one can be tricky. Many RV owners face common installation challenges. These challenges can vary based on the RV’s design and existing plumbing.
Dealing With Tight Spaces
RV kitchens and bathrooms are often small. Working in these tight spaces can be hard. Limited room makes it tough to maneuver tools. Ensure you have the right tools for small spaces. Consider using compact and flexible tools. Having a helper can also make the process easier.
Handling Plumbing Issues
RV plumbing systems differ from residential ones. They may have smaller pipes or unique fittings. Be prepared to adapt your new faucet to these systems. Sometimes, you may need additional adapters. Check your RV’s plumbing before purchasing a new faucet. This can save time and frustration.
Frequently Asked Questions
How To Replace An Rv Faucet?
Replacing an RV faucet involves turning off the water supply, removing the old faucet, and installing the new one. Ensure all connections are tight and check for leaks.
Can I Use A Residential Faucet In An Rv?
Yes, you can use a residential faucet in an RV. Ensure it fits the space and connections match. It can enhance functionality and aesthetics.
What Tools Do I Need For Faucet Replacement?
You will need a wrench, screwdriver, plumber’s tape, and possibly a basin wrench. These tools help in removing and installing the faucet securely.
Are Rv Faucets And Residential Faucets Different?
Yes, RV faucets are generally lighter and more compact than residential faucets. Residential faucets may offer more styles and features.
Conclusion
Replacing your RV faucet with a residential one is a smart choice. It adds comfort and style to your mobile home. The process is simple and quick. You’ll enjoy better water pressure and modern design. Follow these steps and tips for a successful upgrade.
Your RV will feel more like a real home. Enjoy your travels with this easy improvement. Happy camping!