Draining the fresh water tank on an RV is crucial. It helps maintain water quality and system health.
If you’re new to RVing or just looking to ensure your water system stays in top shape, knowing how to drain your RV’s fresh water tank is essential. Over time, water left in the tank can become stale or harbor unwanted bacteria.
Regular draining and cleaning can prevent these issues. This guide will walk you through the simple steps needed to drain your RV’s fresh water tank. Whether you’re preparing for winter storage or ensuring fresh water for your next trip, this process is straightforward. Let’s dive in and keep your RV’s water system running smoothly.
Safety Precautions
Ensure the RV is on level ground before draining the fresh water tank. Turn off the water pump and open the drain valve.
Draining the fresh water tank on your RV requires careful attention. Safety should always be your top priority during this process. Following some simple steps can help prevent accidents and protect the environment.
Protective Gear
Wear gloves to protect your hands from any harmful substances. Safety goggles can also shield your eyes from splashes. Clothing should be durable and cover your skin to avoid contact with water.
Environmental Considerations
Ensure you drain the tank in an appropriate area. Avoid areas where the water can harm plants or wildlife. Use a designated dumping station if available. This helps keep the environment clean and safe.

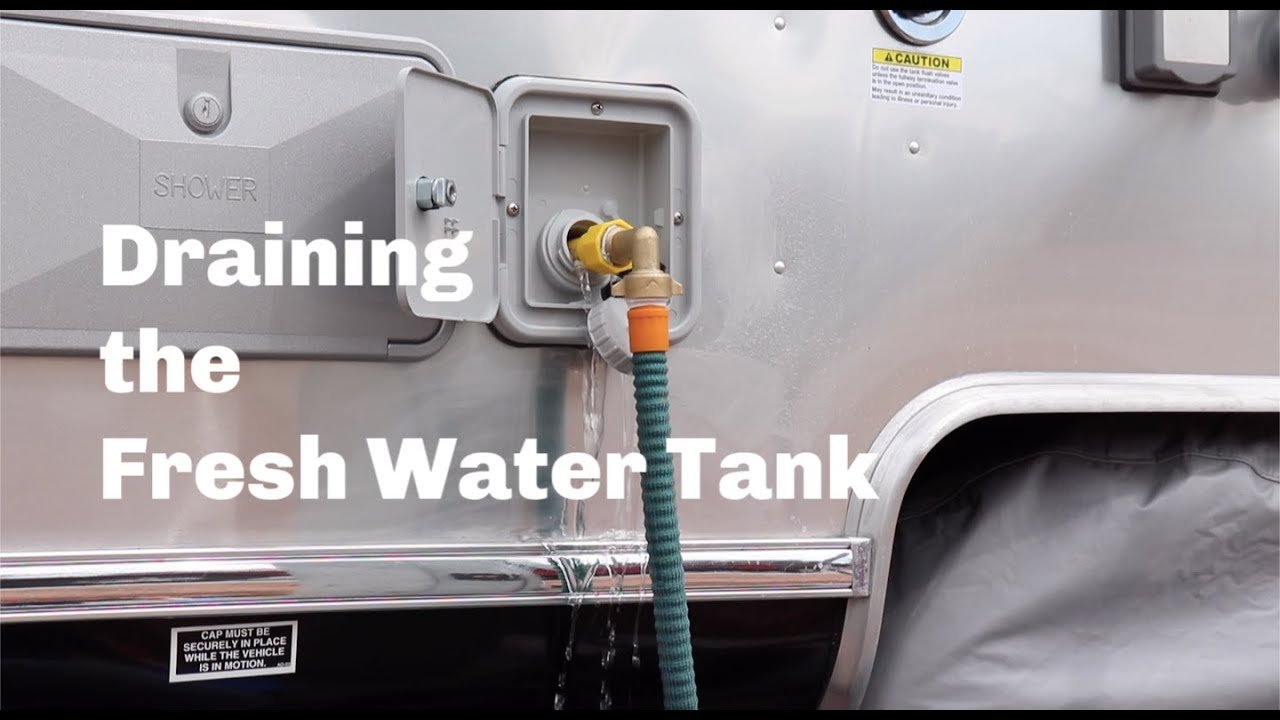
Credit: www.youtube.com
Required Tools
Draining the fresh water tank on an RV is a necessary task. It ensures clean water supply and maintains the tank’s longevity. To do this properly, you’ll need a few essential tools. Using the right tools makes the process quick and efficient.
List Of Tools Needed
Here is a list of tools needed to drain your RV’s fresh water tank:
- Water hose
- Bucket or container
- Adjustable wrench
- Water pump (optional)
- Rubber gloves
Where To Purchase
You can find these tools in several places:
- Local hardware stores
- RV supply shops
- Online retailers like Amazon or eBay
- Big-box stores like Walmart or Home Depot
Ensure you choose quality tools for the best results. Proper tools make the draining process smooth and hassle-free.
Preparing The Rv
Before draining the fresh water tank on your RV, proper preparation is key. Ensuring everything is in order will make the process smooth and efficient. Follow these steps to get started.
Parking The Rv
First, find a level spot to park your RV. This ensures that the water drains completely from the tank. Avoid parking on slopes or uneven ground. Use leveling blocks if needed. This helps maintain stability during the process.
Turning Off The Water Supply
Next, turn off the water supply to your RV. Locate the main water valve and switch it off. This prevents water from entering the tank while you drain it. Double-check to ensure the valve is fully closed. This step is crucial for a smooth draining process.
Locating The Drain Valve
Draining the fresh water tank on an RV involves finding the drain valve. This step is crucial. It allows water to flow out smoothly. Knowing where to find this valve can save you time and effort.
Consulting The Rv Manual
The first place to start is the RV manual. This guide is specific to your RV model. It contains important details. Locate the section about the fresh water system. Look for instructions on draining the tank. The manual often has diagrams. These visuals can help you find the valve quickly.
Common Valve Locations
Drain valves are often in similar places. One common spot is underneath the RV. Check near the water tank. Another location is inside storage compartments. These are usually at the rear or side of the RV. Some models have the valve inside, near the kitchen or bathroom. If you cannot find it, refer back to your manual.
Draining The Tank
Draining the fresh water tank on your RV is essential. This ensures clean water and prevents damage. Follow these steps for a smooth process.
Opening The Drain Valve
First, locate the drain valve. It is usually under the RV. Use a flashlight if needed. Turn the valve counterclockwise to open it. Water should start flowing out immediately.
Monitoring Water Flow
Keep an eye on the water flow. Make sure it is steady. If the flow is weak, check for blockages. You may need to tap the valve lightly. Wait until all the water has drained out completely. This might take a few minutes.
After the water stops flowing, close the valve. Turn it clockwise until it is tight. This prevents leaks and keeps your tank in good condition.
Flushing The Tank
Draining the fresh water tank on an RV ensures clean water for your travels. Begin by turning off the water pump. Next, open the drain valve and let the water flow out completely.
Flushing the fresh water tank on your RV is a crucial task. It helps keep the water clean and safe. Let’s dive into why and how to do it.
Why Flushing Is Important
Flushing removes build-up and sediment from the tank. This prevents bacteria growth. Clean water is vital for drinking, cooking, and bathing. A clean tank ensures your water stays fresh. It also helps extend the life of your RV’s water system.
Steps To Flush The Tank
First, gather the necessary tools. You will need a hose, a bucket, and a water pump. 1. Turn off the water pump. 2. Open the tank drain valve. Let the water flow out. 3. Close the valve when the tank is empty. 4. Attach a hose to the fresh water inlet. 5. Fill the tank with clean water. 6. Turn on the water pump. 7. Open all faucets inside the RV. Let them run for a few minutes. 8. Turn off the faucets and the pump. 9. Open the drain valve again. 10. Let the water drain out completely. 11. Close the valve and fill the tank with fresh water again. Repeat these steps if needed. Your tank should be clean and free of sediment. Now, your RV is ready for the next adventure.
Closing The Drain Valve
Draining the fresh water tank on an RV is a crucial maintenance task. Closing the drain valve correctly ensures the tank remains clean and free from leaks. This step might seem simple, but it is essential for the health of your RV’s water system.
Ensuring A Proper Seal
To prevent leaks, make sure the drain valve is tightly closed. Use a wrench if needed, but avoid over-tightening. Over-tightening can damage the valve or its seal.
Here are some simple steps to ensure a proper seal:
- Check the valve for any visible damage or debris.
- Gently close the valve until you feel resistance.
- Use a wrench to give a slight additional turn, ensuring a snug fit.
Checking For Leaks
After closing the drain valve, it is important to check for leaks. Leaks can lead to water damage and potential health issues from mold or mildew.
Follow these steps to check for leaks:
- Fill the tank with a small amount of water.
- Observe the valve area for any signs of dripping or moisture.
- If you detect any leaks, tighten the valve slightly and check again.
Regular checks ensure that the seal remains intact and the water system functions properly.
Post-drain Maintenance
Proper post-drain maintenance ensures your RV’s fresh water tank stays clean and functional. This process is vital for avoiding unpleasant odors and ensuring safe water. Let’s dive into the key steps involved.
Cleaning The Tank
After draining, clean the tank to remove any remaining debris. Use a mild soap and warm water. Scrub the interior walls with a long-handled brush. Rinse thoroughly to remove all soap residue.
Sanitize the tank by filling it with a mixture of water and household bleach. Let the solution sit for at least four hours. Drain and rinse the tank several times to remove any bleach residue.
Regular Maintenance Tips
Inspect the tank regularly for signs of wear or damage. Check the seals and connections for leaks. Replace any worn-out parts immediately.
Flush the tank with clean water at least once a month. This helps to prevent buildup and keeps the water fresh. Store the RV with the tank empty during off-season periods.
Use a water filter to reduce debris and sediment entering the tank. This extends the life of your tank and improves water quality.
Frequently Asked Questions
How Often Should You Drain Your Rv’s Fresh Water Tank?
You should drain your RV’s fresh water tank every month or after each trip. Regular draining helps to prevent bacteria and algae growth. It also ensures the water remains fresh and clean for your next adventure.
What Tools Do You Need To Drain An Rv’s Water Tank?
To drain an RV’s water tank, you need a hose, a bucket, and possibly a wrench. Make sure the hose is long enough to reach a suitable drainage area. The bucket is useful for catching any residual water.
Can You Drain An Rv’s Fresh Water Tank Yourself?
Yes, you can drain an RV’s fresh water tank yourself. It’s a simple process that involves opening the drain valve. Make sure to follow your RV’s specific instructions to avoid any damage.
What Are The Steps To Drain An Rv’s Fresh Water Tank?
To drain your RV’s fresh water tank, open the drain valve and let the water flow out. You may need to use a hose to direct the water. Close the valve once the tank is empty.
Conclusion
Draining your RV’s fresh water tank is easy and essential. Follow these steps to keep your tank clean and functional. Always remember to turn off the water pump before you start. Open the tank drain valve and let the water flow out.
Check for any remaining water and close the valve securely. This simple maintenance task helps prevent buildup and extends your tank’s life. Regularly draining your tank ensures fresh water for your trips. Keep your RV in top shape and enjoy safe travels.